Intro
This is a short guide on how to backup corporate Microsoft SharePoint document libraries (that is, all “folders” you’ll typically find under Quick access at https://yourcompany-my.sharepoint.com/) using Borg. In particular, rclone will be responsible for one-way, read-only syncing your SharePoint files to local disk, from where borg backups them to an encrypted remote repo (SFTP / SSH in this example). Goal is to have a periodic job running on some server, NAS, RaspberryPi, etc. to backup all of your company’s SharePoint to a target that you’re in control of. This article builds on this blog post and the official rclone docs for OneDrive.
Prerequisites
First of all, you’ll have to be a Global Administrator within your Microsoft / Entra organization. Check this under Roles & admins in the Entra admin center.
Despite that, you’ll need a machine to run the backups from, which has enough storage space to fit your entire SharePoint library (we’ll use actual file syncs instead of virtual FUSE mounts).
Lastly, you’ll have to have borg and rclone installed. When on Debian, Ubuntu or many other Linux distros, the officially packaged rclone is awefully outdated though (v1.60.1 from 2022 while I write this) and even the official docs recommend to install via the downloadable .deb / .rpm or standalone binary instead.
Entra OAuth app registration
We’re going to use the client credentials flow for rclone to authenticate against SharePoint. This comes at the benefit that rclone will use permissions directly associated with the Azure AD Enterprise application, instead of running “on behalf” of a user account. This way, the backup script is agnostic of any user’s identity.
Create an enterprise app
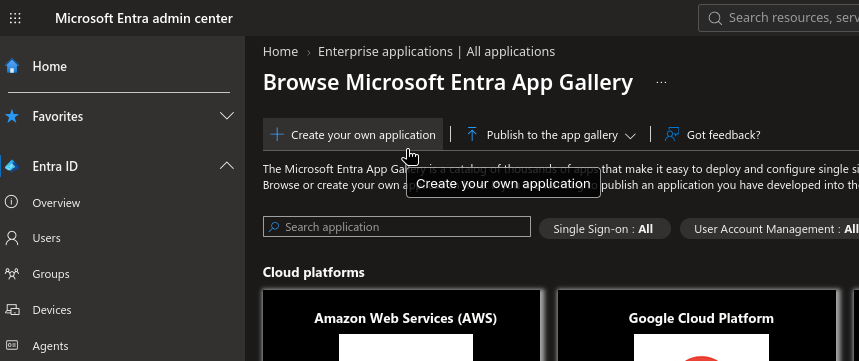
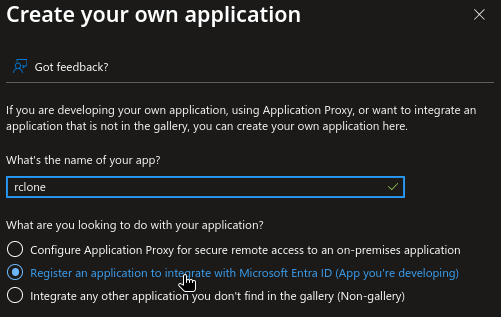
Log in to the Entra admin center and browse to Enterprise apps. Create a new application and choose “Register an application to integrate with Microsft Entra ID” for it.
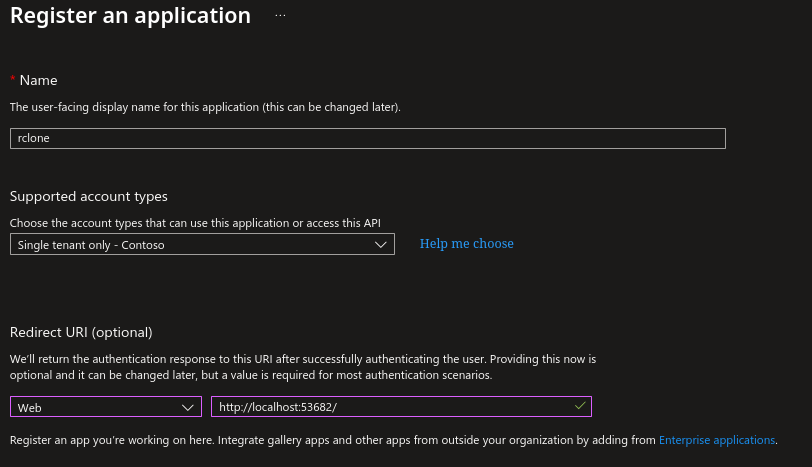
Make it support the “Single tenant only” account type and configure http://localhost:53682 as a Web-type redirect URL.
Go to Overview and copy the application / client ID and the directory / tenant ID for later.
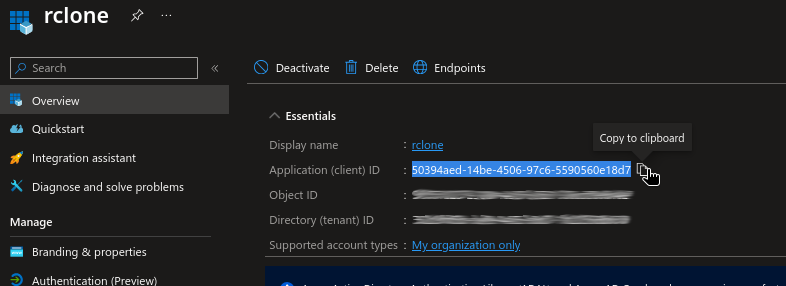
(btw., this is not my real client ID, I changed it for the screenshot)
Create an OAuth client secret
Second, go to App registrations in the left-hand side main menu, choose your newly created app from the list and go to Certificates & secrets.
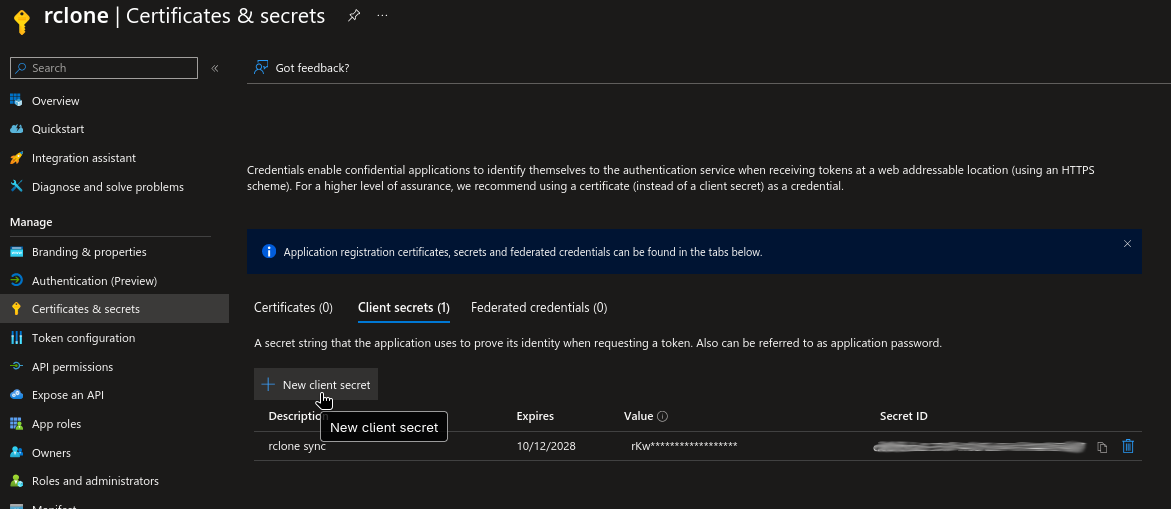
Create a new client secret (important: copy the secret’s value for later, you’ll not get a second chance) and choose the following Application permissions (important: not Delegated permissions) under “Microsoft Graph API” for it:
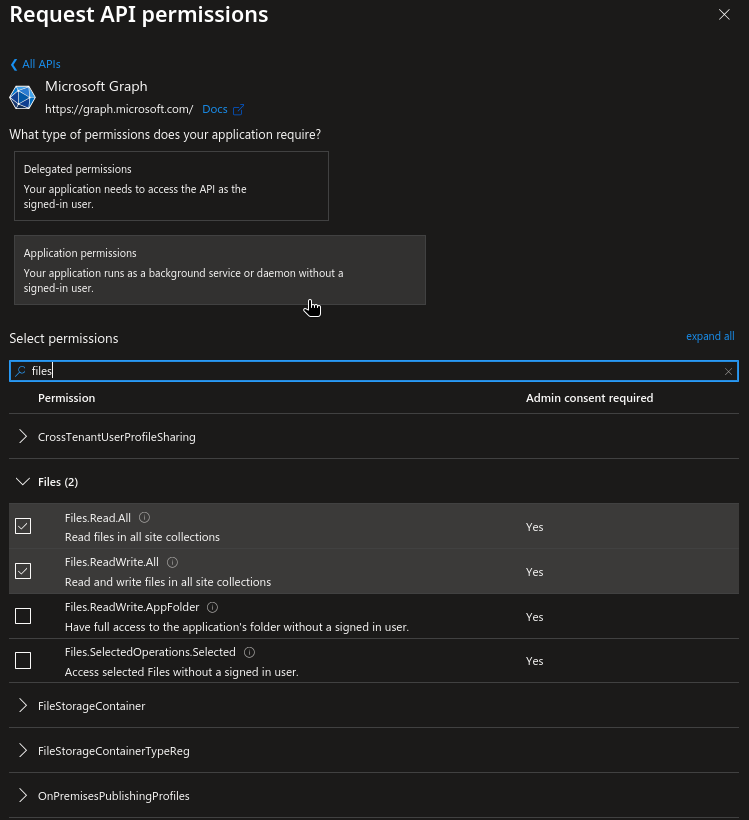
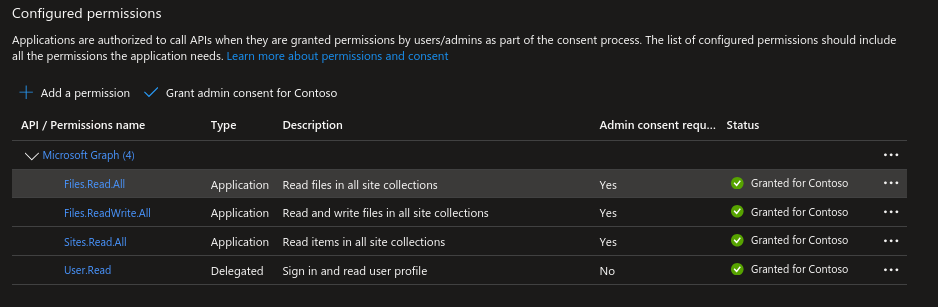
Files.Read.AllFiles.ReadWrite.All(probably not even needed, not sure though)Sites.Read.All(for finding thedrive_idlater)User.Read
Lastly, hit “Grant admin consent for …”.
Set up rclone
You can either walk through the interactive rclone CLI (rlone config -> New -> “Microsoft OneDrive (ID 42)”, …) or edit the config directly. I’ll explain the latter here.
Configure the remote
Create the rclone config folder if not yet existing:
1
mkdir -p ~/.config/rclone
Create (or edit the existing) config file at
~/.config/rclone/rclone.confand paste the following contents:1
2
3
4
5
6
7
8[sharepoint-mydocs]
type = onedrive
client_id = <your-application-id>
client_secret = <your-client-secret>
tenant = <your-tenant-id>
client_credentials = true
drive_type = documentLibrary
access_scopes = Files.Read Files.Read.All Sites.Read.All offline_accessReplace the
client_idwith the application ID you copied for your newly created enterprise app earlierReplace the
tenantwith the directory / tenant ID from the that same overview page (blurred in my screenshot above)Replace the
client_secretwith the secret value you copied right after you created itObtain your document library’s drive ID
- Run a reconnect command
1
rclone config reconnect sharepoint-mydocs:
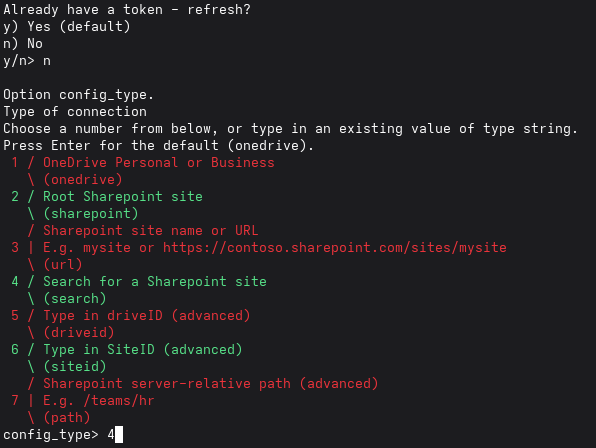
- Choose option (4) (“Search for a Sharepoint site”)
- In the search field, search for the name of your document library / Team (e.g. sth. like “My Docs”, “Marketing”, “Development”, etc.)
- Proceed with the interactive wizard to eventually obtain the
drive_id(will be added to your config)
- Run a reconnect command
If everything worked, you’d should be able to list your documents now:
1 | rclone ls sharepoint-mydocs: |
Run a sync
You may now want to run a one-time sync of all of your documents, for example to a local folder at ~/SharePoint/My Docs (create it first).
1 | rclone sync sharepoint-mydocs: "$HOME/SharePoint/My Docs" --ignore-checksum --ignore-size -P |
You may not need --ignore-checksum and --ignore-size, but I did – due to a known issue with the OneDrive API.
Set up borg
This guide assumes your backup target is an SSH host, such as a Hetzner Storage Box, some remote NAS or the like.
- Initialize a new repo This requires to choose a passphrase, which is used to encrypt the repo encryption key. Make sure to remember this and keep it safe in your password manager!
1
borg init -e repokey ssh://your-backup-host/sharepoint-backup
- Export the key
Very important: export your repo key (store it in your password manager or somewhere secure), otherwise you’ll loose access to your backups.1
2
3borg key export ssh://your-backup-host/sharepoint-backup > .borg_key
cat .borg_key # now copy it!
rm .borg_key - Create a file for your passphrase (so backups can run non-interactively as a scheduled job later)
1
2
echo "your-key-passphrase" > .borg_passphrase
chmod 600 .borg_passphrase - Validate repo access (check if stuff works)
1
BORG_PASSCOMMAND="cat .borg_passphrase" borg list ssh://your-backup-host/sharepoint-backup
Create backup script
We’ll use the following script to run an rclone sync, followed by a borg backup automatically. Create it, for example, at ~/backup_sharepoint.sh.
1 |
|
You may add email notifications to this script if you want (leave a comment if interested in details).
Lastly, create a cron job that runs the script every night.
- Run
crontab -e - Paste a cron command like this:
1
30 1 * * * /bin/bash $HOME/backup_sharepoint.sh # at 1.30 am
Good luck!

Comments