Introduction
I bet there are a ton of tutorial like this out there already and also the Nextcloud documentations are brilliant themselves. However, I want to quickly document the process of migrating a Nextcloud 19 instance from SQLite to MySQL as a database backend.
Please refer to the official guide for further information.
Setup
My starting situation is two existing, running Docker containers, one for Nextcloud (nextcloud:19) and one for a MySQL server (mysql:5.7), which I also use for other applications as well.
1 | $ docker ps |
Migrating
Creating a new database
First, a new database is needed, which can later be filled by Nextcloud. To do so, use the mysql command-line client provided by the Docker container to interactively create a new database and a corresponding user.
1 | $ docker exec -it nextcloud mysql -u root -p; |
After typing your root password, you’re logged in to the interactive SQL console. Run the following queries.
1 | CREATE DATABASE 'nextcloud'; |
As Nextcloud’s docs say, you need to explicitly enable MySQL 4-byte UTF-8 support. This is done by the last of the above queries.
Configuring a Docker network
If you are using Docker, your Nextcloud container needs a way to talk to your database container. To enable this, they both need to be in the same virtual network. The following shows how to create a new network (called mysql) and join both containers to it.
1 | $ docker network create mysql |
Assuming the database container has the name mysql, like in this example, the Nextcloud container can now reference through simply using mysql as a DNS name.
Migrating data
As part of the second steps, Nextcloud’s excellent occ command-line tool comes to play. It essentially does all the heavy lifting for you. Simply follow these steps.
Note: If you are not using Docker, but a native Nextcloud installation, simply leave out the docker exec command and run php occ directly.
First, we want to turn maintenance mode on, to “freeze” the data.
1 | $ docker exec -it -u www-data nextcloud php occ maintenance:mode --on |
Next, we need to do the server-side part of the above mentioned migration to 4-byte UTF-8 support.
1 | $ docker exec -it -u www-data nextcloud php occ config:system:set mysql.utf8mb4 --type boolean --value="true" |
Now, we can perform the actual migration from SQLite to MySQL. This may take a while, depending on the size of your database. Luckily, mine was only about 27 MB in size.
1 | $ docker exec -it -u www-data nextcloud php occ db:convert-type --all-apps --clear-schema mysql nextcloud_user mysql nextcloud |
Eventually, turn off maintenance mode again.
1 | $ docker exec -it -u www-data nextcloud php occ maintenance:mode --off |
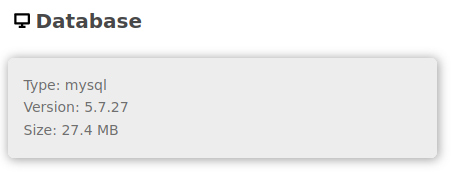
If everything went well, Nextcloud has updated its own config to use the MySQL database instead of SQLite. You can check this at http://your-nextcloud-server.tld/settings/admin/serverinfo.
Conclusion
The above process helped me – thanks to the great tooling and documentation provided by the Nextcloud community – to migrate my Nextcloud instance from the “slow” SQLite database engine to MySQL. I hope it works for you as well.
Good luck!
P.S.
Please keep in mind that the start command for your Nextcloud container is different now. For instance, if you want to update your container, you have to pass different parameters than before. Here is what works for me:
1 | $ docker run -d -v /var/data/nextcloud:/var/www/html -v /var/data/nextcloud/data/:/var/www/html/data -p 127.0.0.1:9000:80 --network mysql -e MYSQL_DATABASE=nextcloud -e MYSQL_USER=nextcloud_user -e MYSQL_PASSWORD=iwonttellyouthis -e MYSQL_HOST=mysql --name nextcloud nextcloud:19 |
(An even better practice would be to not use file system mounts but actual Docker volumes here.)
Comments