Introduction
In this article, I’ll explain how to (1) set up Kanidm as an alternative to identity management (IDM) solutions like KeyCloak or Authentik and (2) configure it to be used for single sign-on (SSO) in Wakapi.
Kanidm setup
In the following sections, I’ll quickly walk you through setting up a self-hosted Kanidm instance. In case you already have one running you can mostly skip this part and jump straight to the Wakapi configuration.
Another, more “declarative” way of provisioning and configuring Kanidm is to use the excellent kanidm-provision tool, as showcased in this article.
Running the server
Since claiming to be “secure by default, Kanidm is quite stringent about its security configuration and strictly mandates TLS. That is, even for a local development setup, you’ll need TLS certificates.
In this guide, we’ll generate a self-signed certificate, but in production you must, of course, always request a real certificate, e.g. from Let’s Encrypt.
Also, we’ll use the following local domain names in this example. In a real-world setup, you will, of course, have real domains (such as wakapi.example.org):
- Kanidm will be served at idm.local
- Wakapi will be served at wakapi.local
To make these resolve locally, I simply edited by /etc/hosts. But, again, that’s only for the sake of this tutorial. You will use actual, publicly routed domains for your setup.
Create self-signed certificate
1 | openssl req -x509 -newkey rsa:4096 -keyout key.pem -out cert.pem -sha256 -days 365 -nodes |
You may just skip the interactive questions and leave all attributes at their defaults.
Important: For a production setup, you’ll want to use tools like acme.sh, certbot or even Caddy (possibly configured as a reverse proxy in front of your Kanidm) to issue TLS certificates via HTTP-01 or DNS-01.
Create server config
As a next step, we’ll have to create a TOML config file for Kanidm, e.g. named server.toml:
1 | # server.toml |
Replace idm.local with your actual domain name. Also, in a production setup, your IDM will likely listen on port 443, so you can skip the :8443 part in the URL.
Run server Docker container
We’ll run Kanidm in Docker, because it’s the most convenient and sort of de-facto standard way of deployment.
1 | docker volume create kanidm_data |
This creates a persistent Docker volume where Kanidm stores its database and then run the official Docker image with your config file and the TLS cert mounted into the container as bind mounts.
Afterwards, you’ll need to create the “superadmin” password for the default idm_admin user, which you’ll later use to run CLI commands against the server.
1 | docker exec -it kanidm kanidmd recover-account idm_admin |
Setup client tools
Next up, we’ll have to install and configure the client tools, that is, the kanidm CLI interface which is the official way to interact with the server (unfortunately there’s no configuration web UI).
The official docs mention different ways of installing the client tools, depending on your OS. Unfortunately, they apparently don’t just provide a static binary that you could just download and run.
Since I didn’t want to include any third-party repos for my package manager (DNF on Fedora, in my case), I just pulled the statically linked kanidm binary from the kanidm/tools Docker image like so:
1 | docker run -it --rm --name kanidm-tools kanidm/tools |
Feel free to use the “official” sources instead though.
Afterwards, we’ll have to create the client config file (so kanidm knows which server to connect to and which cert to verify against):
1 | # ~/.config/kanidm |
The client expects another file to be existing where it can store its session state, so create that empty file in addition:
1 | touch ~/.cache/kanidm_tokens |
Now we’re ready to log in using the password we obtained above (omit the --accept-invalid-certs when using non-self-signed TLS certificates for your instance):
1 | ./kanidm --accept-invalid-certs login --name idm_admin |
OAuth 2 client setup
Now that we have a running Kanidm instance (check by navigating to https://idm.local:8443, or whatever your public URL is), we’ll need to register an OAuth 2 client for Wakapi with Kanidm.
1 | ./kanidm --accept-invalid-certs system oauth2 create wakapi "Wakapi" https://wakapi.local |
Replace wakapi.local with your Wakapi instance’s actual domain name. The third command disables PKCE, which is usually fine for confidential (i.e. non-“public” / “server-side”) clients as in the case of Wakapi. You may want to check this discussion about Why is disabling PKCE considered insecure? anyway, if you’re interested.
Lastly, we’ll create a group (called wakapi-users) that is granted permission to access Wakapi and request all scopes (openid, email and profile):
1 | ./kanidm --accept-invalid-certs group create wakapi-users |
User management
Last step before we can move on to the Wakapi configuration is to create some actual users in the IDM and add them to the respective group. Kanidm is, again, being super strict here and doesn’t just allow password-based login but requires every user to have TOTP set up in addition.
1 | kanidm --accept-invalid-certs person create ferdi "Ferdi" # replace with your preferred username |
The third command brings up an interactive session to configure user credentials. In the session, do this:
- Set up a TOTP by typing
totpand scan the QR code with your preferred authenticator (e.g. Aegis, Google Authenticator, KeePassXC, etc.) - Set up a password by typing
pw - Save the changes by typing
commitandquit
Wakapi configuration
Finally, we can hook up Wakapi with Kanidm as an SSO provider. The following assumes you already have a running Wakapi instance (at https://wakapi.local, in this example), configured via the YAML configuration (e.g. mounted into the Docker container via -v $(pwd)/config.yml:app/config.yml:ro). If you haven’t, check out the README on how to run Wakapi.
Adapt your Wakapi config as follows:
1 | # config.yml |
Again, replace idm.local:8443 with your actual Kanidm public URL. The wakapi suffix in the endpoint URL corresponds to the name of your OAuth 2 client created above.
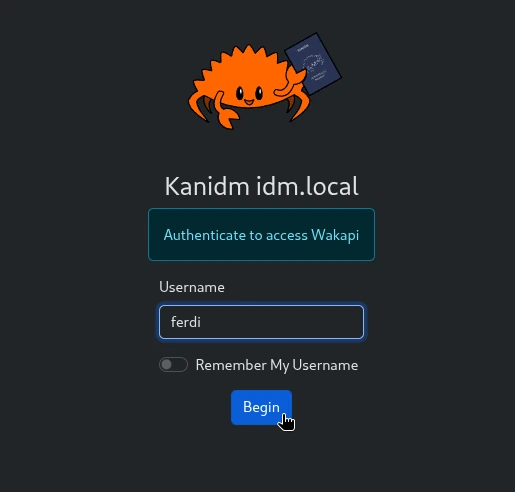
After restarting Wakapi, it will now give you the option to use Kanidm for SSO.

This blog post was partially inspired by From Keycloak to Kanidm.
Comments