Introduction
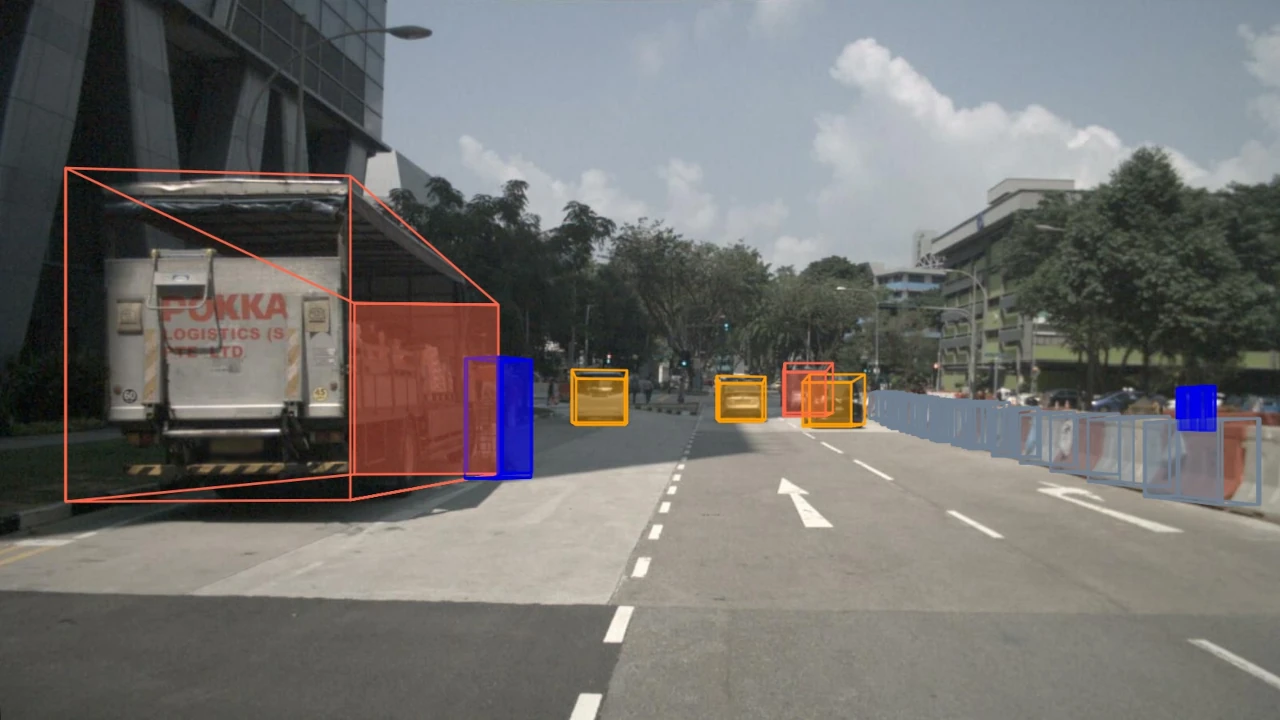
FCOS3D (ICCV 2021) is a deep learning-based model for monocular 3D object detection in images. That is, other than common object detectors like YOLO, it estimates three-dimensional bounding boxes for objects, i.e. involving a depth component next to x and y positions. Moreover, it does so in a monocular way, that is, from just a single image. Considering that most object detector use at least stereo images or even lidar point clouds, you can guess that this is an especially hard problem. On the one hand, this is super useful, because it could technically run on arbitrary pictures taken by your smartphone. On the other hand, you’ll have to be aware that detection accuracy is, of course, much worse compared to detectors that utilize richer sensor data.
While FCOS3D, having been published in 2021 already, is arguably not actually state of the art anymore, I still wanted to use it as part of my research, especially because it’s still one of the most widely adopted models in that realm. However, it took me quite a while to get it running on my own images. To save other people from similar struggles, here is a brief, hacky description of how to get it running locally.
Please note that this is the way that I managed to get the model running. Perhaps there are different or simpler ways, but this is what worked for me.

Prerequisites
You’ll need the intrinsic calibration of your camera as a 3x3 matrix. You may use OpenCV to estimate it.
Setup
FCOS3D is implemented in the MMDetection3D framework, which, btw. supports a whole lot of other detection models in addition. The framework’s code base is quite a mess and probably not particularly what you what consider well-structured and self-documenting code. Nevertheless, I luckily managed to dig my way through it. So here’s what I did, roughly following MMDetection’s Getting Started and their docs on inference.
First of all, I had to fall back to older versions of Python, PyTorch and CUDA to get things working.
Step 1: Clone repo and download pre-trained model
1 | git clone https://github.com/open-mmlab/mmdetection3d.git |
We’re using the model that was pre-trained on the nuScenes dataset.
Step 2: Use Python 3.8 and virtual environment
I used pyenv to install a separate Python distro alongside my system-wide installation. Alternatively, you may install Python 3.8 natively, or use a different version manager such as asdf.
1 | pyenv install 3.8.19 # install 3.8 |
Step 3: Install dependencies
From some GitHub issue (which I can’t find anymore, unfortunately) I learned that I’d have to use PyTorch with CUDA 11.7. Also, I used the (outdated) MMDetection-specific versions mentioned in their docs.
1 | pip install torch==2.0.0+cu117 torchvision==0.15.1+cu117 --index-url https://download.pytorch.org/whl/cu117 |
Step 4: Inject custom config
This is probably the second-most hacky part of all, but I couldn’t find a better way at first sight. We need to inject our custom calibration matrix into the (pickled, binary) config parameters file (aka. ANNOTATION_FILE). To do so, we load the nuScenes-specific config provided by the repo, modify it, and save it again.
1 | import pickle |
Step 5: Apply some hacks
In addition, I had to apply a bunch of custom changes to the MMDetection3D, including:
- Passing the
cam_typecommand-line argument on to the inferencer. - Ignoring lidar-specific parameters (see #2868)
- Ignoring unneeded hard-coded image path param
Here’s the according Git patch: mmdet3d_fixes.patch.
Apply it with git am mmdet3d_fixes.patch.
Step 6: Run inference 🚀
1 | python demo/mono_det_demo.py \ |
Comments